by Paul Below
![]()
Why build an off-axis mask? There's a couple of possible reasons.
 The reason that is often stated in amateur astronomy books is
to stop down the aperture of a larger scope in order to reduce the atmospheric
turbulence. When looking at bright objects under certain conditions
doing this might possibly increase the contrast and sharpness of the image
(at the cost of decreased image brightness).
The reason that is often stated in amateur astronomy books is
to stop down the aperture of a larger scope in order to reduce the atmospheric
turbulence. When looking at bright objects under certain conditions
doing this might possibly increase the contrast and sharpness of the image
(at the cost of decreased image brightness).
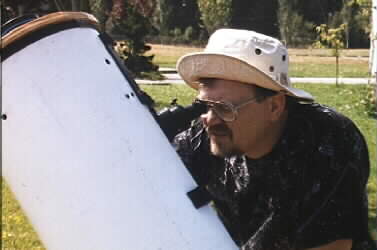
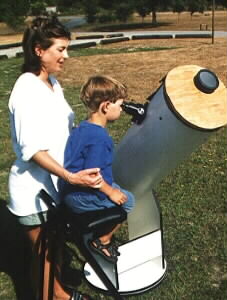
However, the reason I built an off-axis mask is for solar observing (the photo at left is of the author looking at sunspots). I already had a full-aperture solar filter for my travel scope (an 80mm refractor) but wanted to also be able to use my 10" Dob for solar observing and take advantage of its longer focal length.
I did not want to purchase a full size solar filter for the Dob, and saw
no reason to do so since the sun has no shortage of
brightness!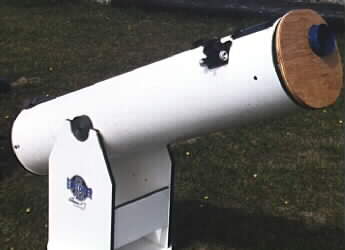 The cost of solar filters increases significantly with
size, probably the best reason of all to use a small filter!
The cost of solar filters increases significantly with
size, probably the best reason of all to use a small filter!
Full aperture solar filters come in two types: glass and mylar. My preference is for the glass as they are reputed to be a little more resistant to wear, and they do provide a yellow-white image of the sun (which makes it easier to explain to people what they are looking at) even though they tend to cost a little more than mylar.
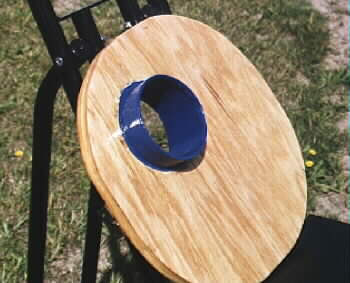
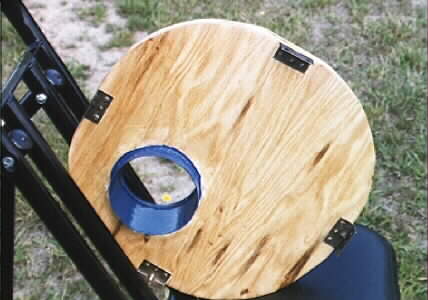
The size of the hole in the off-axis mask (see the photo at right of the mask mounted on the telescope) should be small enough that none of the spider vanes appear in the light path. My dob has a 4-vane spider, and the solar filter I had was just the right size to fit into one quarter of the light path. (The next two pictures show the front and the back of the completed mask.)
 I had a sheet of 3/4 inch plywood on hand already, so made use of it. This
resulted in a very sturdy but heavy unit. In fact, I have to use a
heavy weight on the back of the Dob to balance it. A thinner piece
of plywood would have worked just as well as there is no stress on the mask.
I had a sheet of 3/4 inch plywood on hand already, so made use of it. This
resulted in a very sturdy but heavy unit. In fact, I have to use a
heavy weight on the back of the Dob to balance it. A thinner piece
of plywood would have worked just as well as there is no stress on the mask.
The first task I had was to find a suitable material to hold the filter in place. I searched for a piece of plastic pipe but could not find one that was the appropriate diameter. In the end, I took my tape measure and walked through the hardware store and then the grocery store(!) I discovered several cans that were the right diameter but then I found that a small container of Quaker Oats was just the right fit. And since cardboard is easier to cut than metal, I went with it.
I cut a square piece of plywood. It's important that the mask be wide enough to completely cover the front of the telescope so that no sunlight can get in. If in doubt, cut the mask slightly oversize to be safe.
 I
then rounded off the corners of the mask and sanded them down to make a smooth
surface. I used a jigsaw to cut the hole in the mask, but on second
thought I probably should have used a hole drill in order to get a better
circle. I sanded the entire mask and applied a light coat of stain.
I
then rounded off the corners of the mask and sanded them down to make a smooth
surface. I used a jigsaw to cut the hole in the mask, but on second
thought I probably should have used a hole drill in order to get a better
circle. I sanded the entire mask and applied a light coat of stain.
I put the cardboard tube in the hole, and glued it into place. After the glue dried, I used wood filler to completely patch both the top and bottom where the tube meets the plywood to make sure there were no holes that light could sneak through. After the filler dried I painted the tube to add strength to it.
I then applied several coats of a spray-on clear liquid plastic. The last step was to attach some metal braces on the edge. These fit down snugly over the rim of the telescope and hold the mask in place.
And that's all there is to it! An off-axis mask, an easy and useful building project.
Bill Edmonds taking a look with the completed mask in place, and some visitors doing the same.

|
|
and sunspot photos taken the same day: a closeup and a wider view.


![]()
Return to the home page of the
![]() Battle Point Astronomical Association.
Battle Point Astronomical Association.
![]() Return
to the top of this page.
Return
to the top of this page.